HOW TO MAKE EMBROIDERED PATCHES - PHOTOSHOP TUTORIAL
I've been trying to find a great tutorial to create an embroidered look to my logos for a long time. I did however find a few that had promise but the steps were to many and the process took much longer than expected. Giving me a result that was satisfactory buy not great.
Detailed in the video and the steps below I will share with you my process to a great embroidered patch look for any logo. This tutorial starts in Illustration then to Photoshop.
P.S. Sorry about all the "P" poping and blowing in the mic. I really need to get a mic pop filter.

Step 1
In Illustrator use only the solid colors of the logo. Remove any highlights as this will cause the final look of the embroidered patch to look to busy.
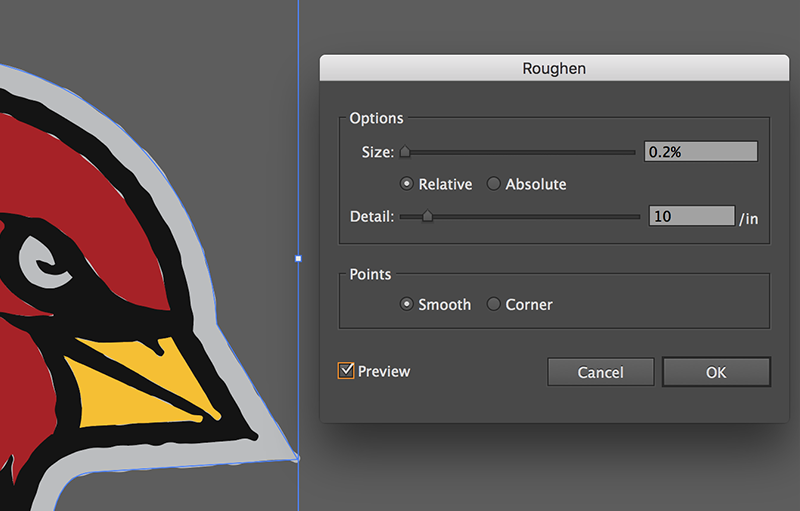
Step 2
Apply a Roughen effect to your artwork. I'm using 5% for Size, 10 for Detail and checked Smooth and Preview to see the effect.
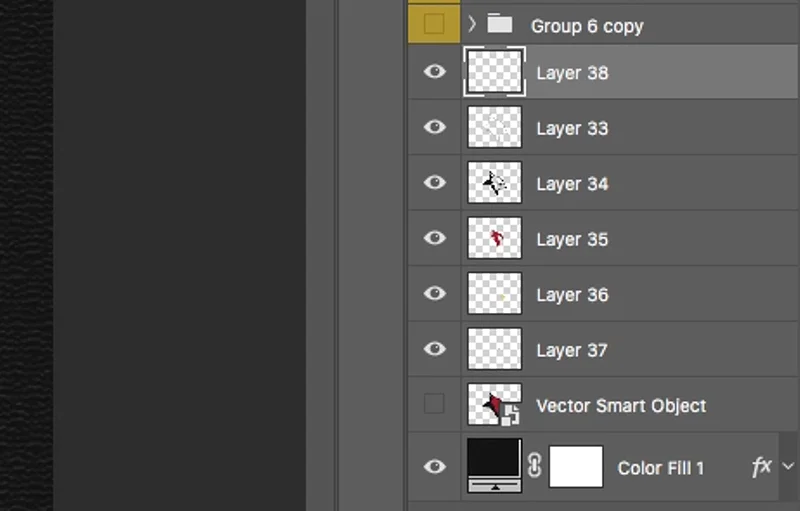
Step 3
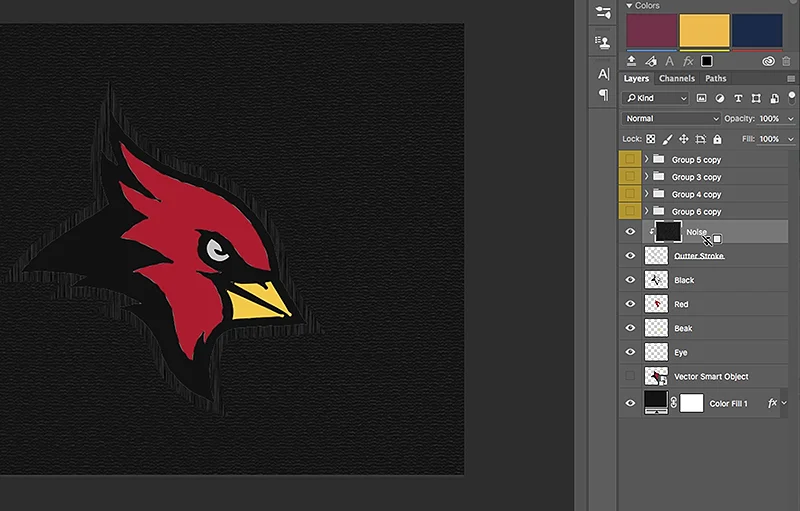
Copy and paste your Roughened logo into Photoshop. Next using the Magic Wand tool put each color of your logo on its own layer. Ex. Select the red with the Magic Wand tool then hold COMMAND + J to duplicate the selection onto its own layer. You should have a few layers like this.
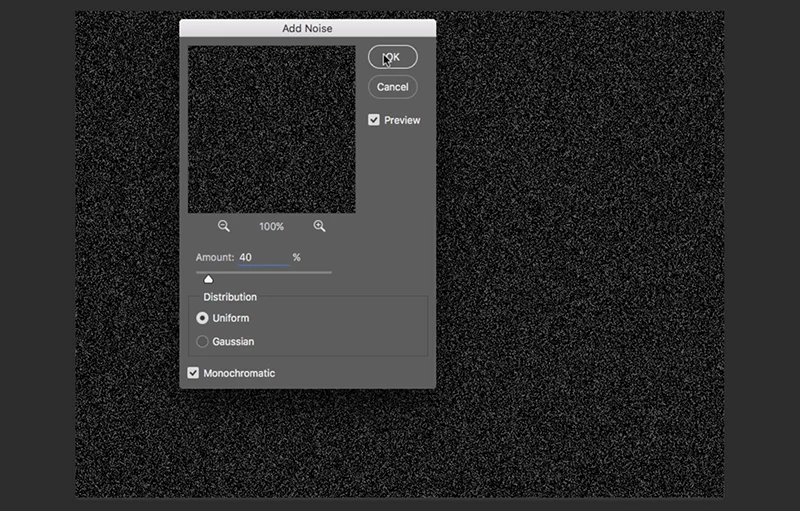
Step 4
We are now going to make our stitch texture. Make an new layer and fill with black. Go to Filter > Noise > Add Noise. Set Amount 40 and check Monochromatic. Click Ok.
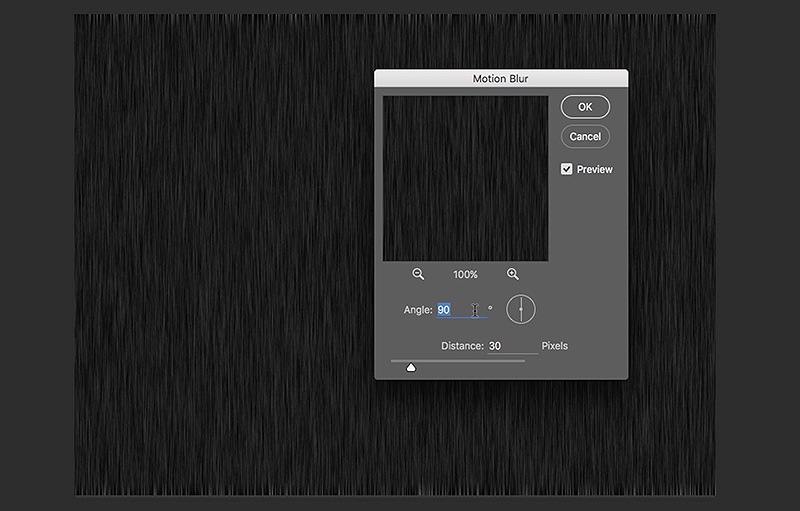
Step 5
Go to Filter > Blur > Motion Blur. Set Angle to 90º and Distance 30px. Click Ok.
Step 6
With the Noise layer selected create a Clipping Mask to the outline layer of the logo. To make a Clipping Mask right click on the layer and choose Clipping Mask from the dropdown menu or you can hold ALT and click the layer near where the bottom.
Step 7
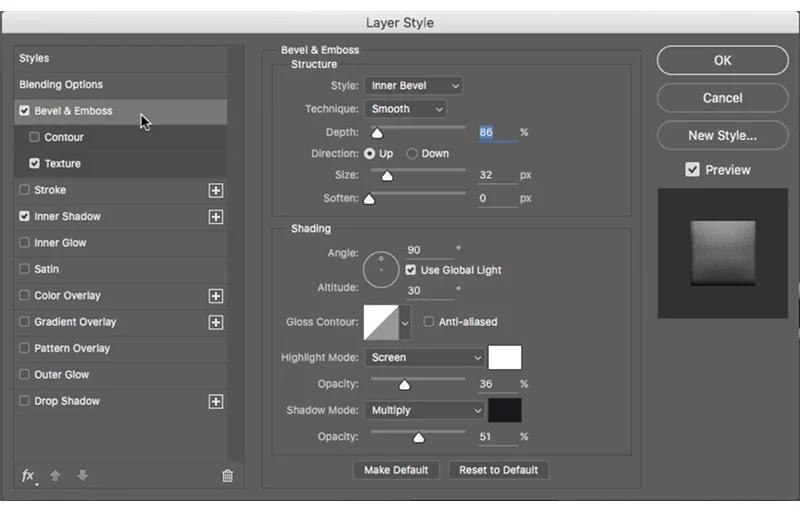
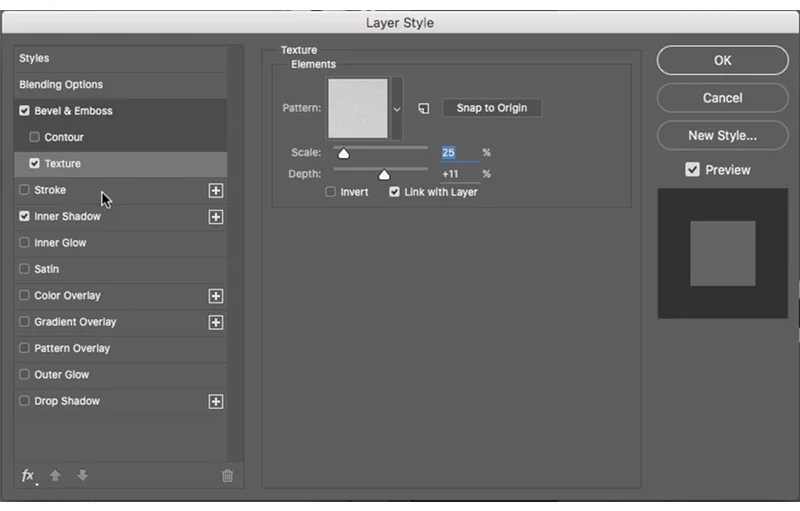
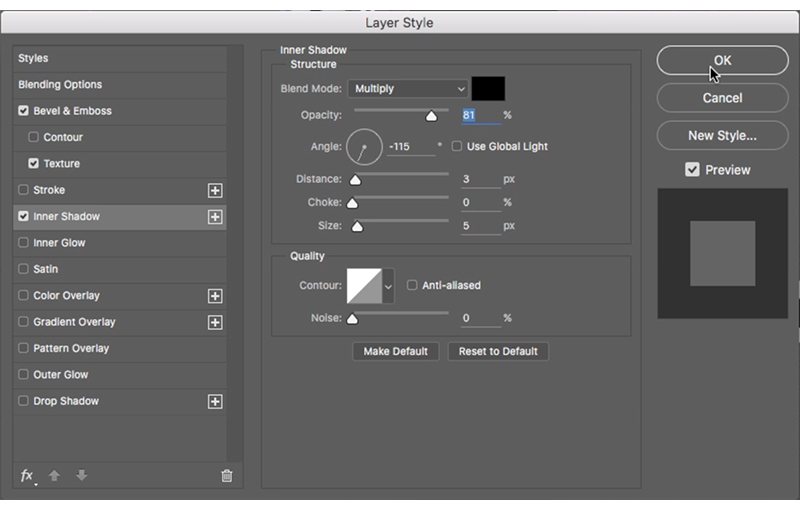
On the outline layer lets add some Layer Styles. From the bottom click Fx (Add a layer style) and in the dropdown menu choose Bevel & Emboss. Use values 86 for Depth, Size 32. In Texture use 25% for Scale and 11 for Depth. Inner Shadow blend mode Multiply at 81%, Distance 3, Size 5 and click Ok.
Step 8
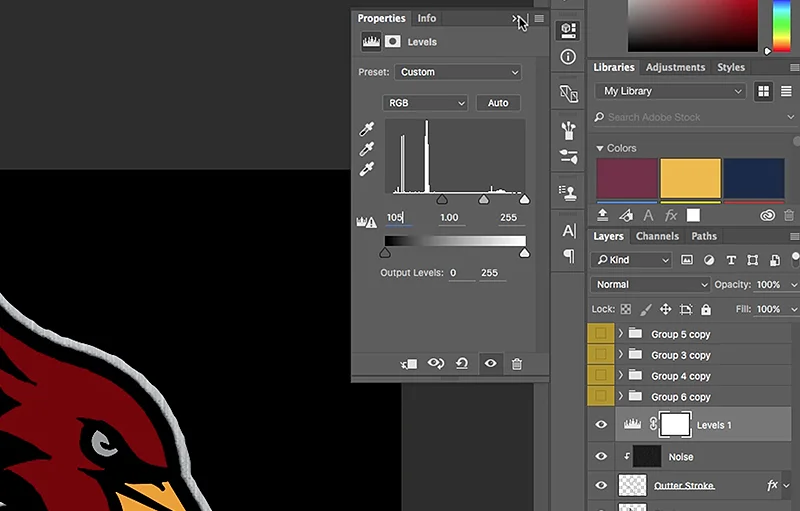
Change the Noise layer to Color Dodge under the Blending options. Next add a Levels adjustment choose from the adjustment layer dropdown. Set to 105, 1.00, 255, then make it a a Clipping Mask to the Noise layer.
Step 9
Duplicate the Levels layer and give it an opacity of 30%. At this point your online layer should look like the following.
Step 10
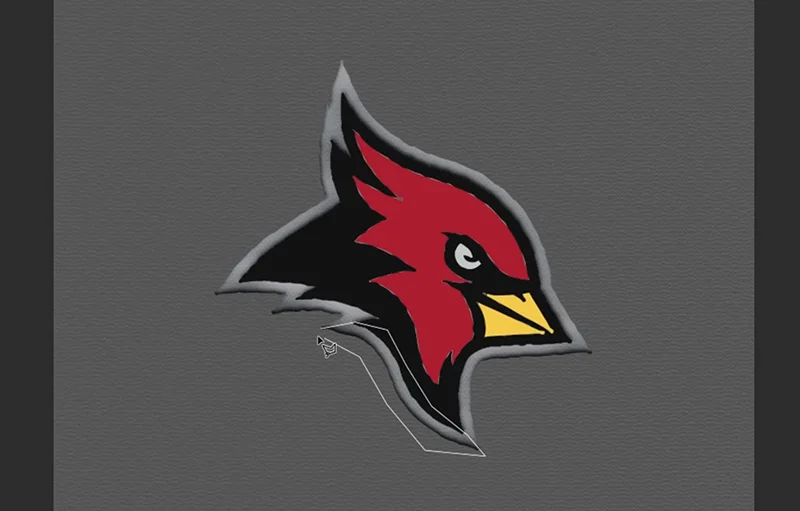
Give your Noise layer a mask that will hid it's texture. Then using the Lasso Tool make a selection for your stitch effect to be reveled. Fill the selection with white on the mask and this will show your stitch effect.
Step 11
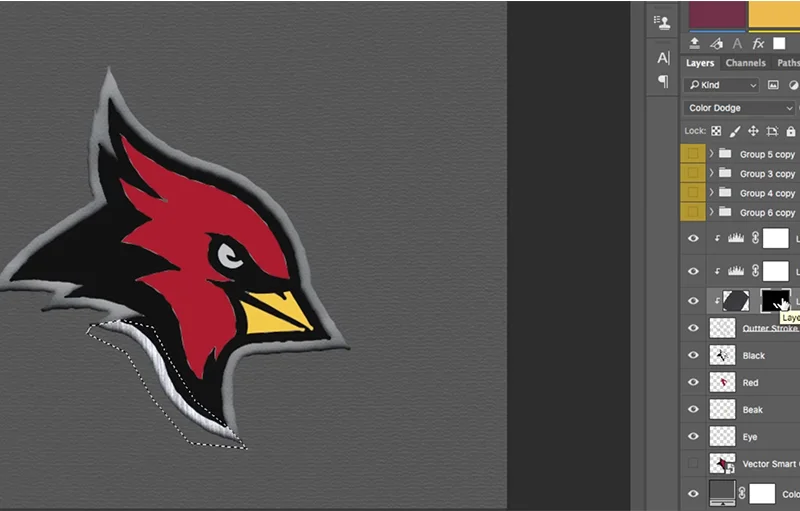
The next following steps will take the longest but will give you a really great result. First unlink your Noise layer from the mask by clicking on the chain-link icon (highlighted by the yellow circle). Then rotate the Noise layer that it runs parallel to the top and bottom points of the selected area (visual below with yellow lines).
Step 12
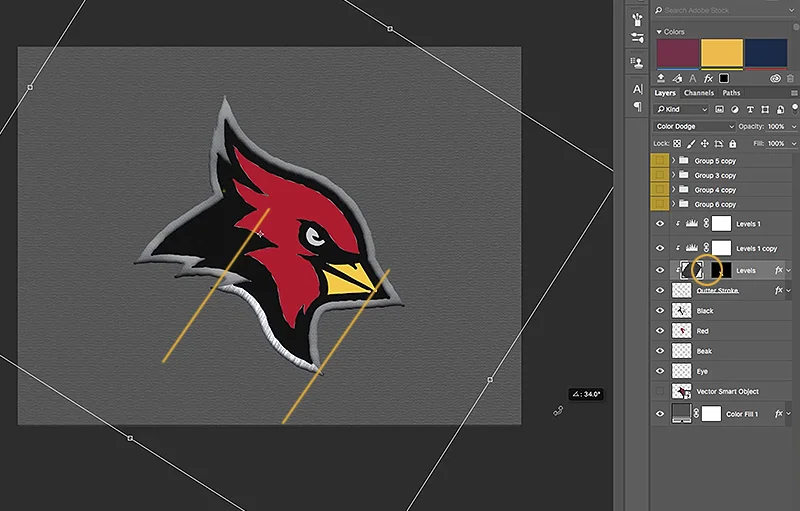
Duplicate the Noise layer and we will repeat this process all around the outline until we come full circle. Tip: Make sure the only selection on the mask is the new selection.
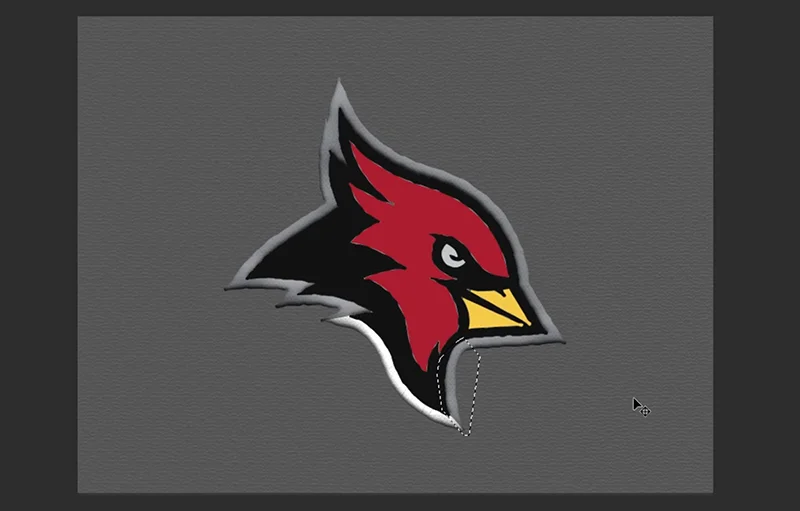
Step 13
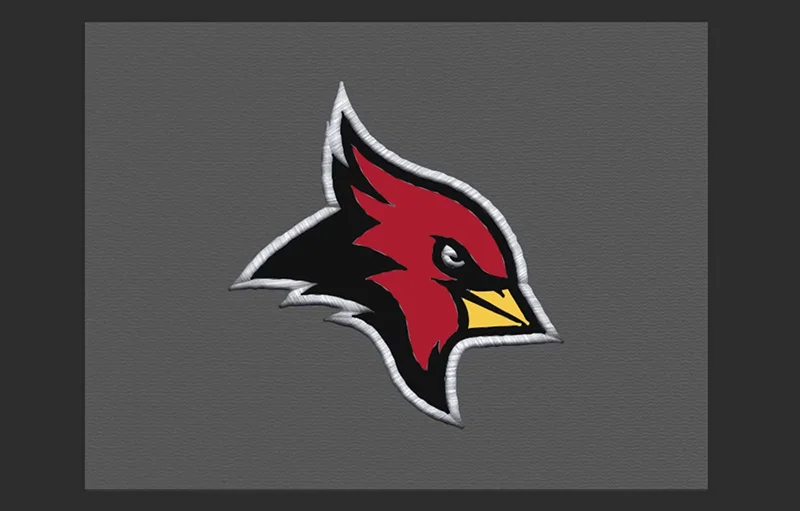
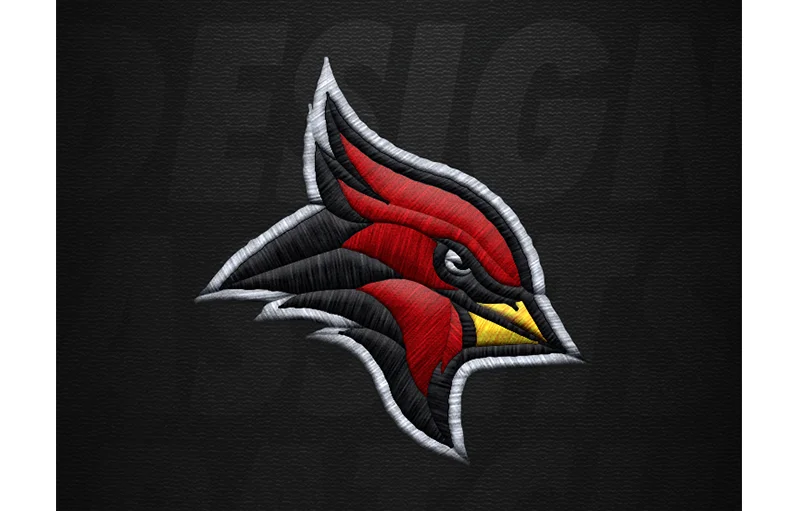
Take your time and make it worth your while. Copy the Noise layer and Level adjustments to the next color layers and repeat from Step 11. You will finally end up with something similar to the below stitched logo. Download Free Assets to get you Started.
Thank you. Let me know what you think, your feedback will help make better mockups and tutorials in the future.
- Webpixum